
Guide to Install SPC Stone Plastic Composite Flooring
2025-04-18
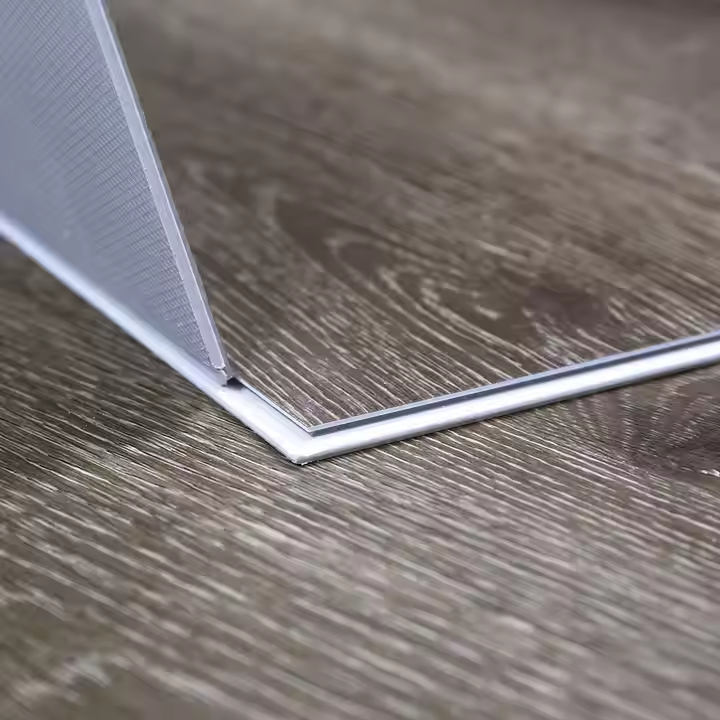
1. Introduction to SPC Flooring
Stone Plastic Composite (SPC) flooring is a modern, versatile flooring solution that combines natural stone powder with polyvinyl chloride (PVC) resin, offering exceptional durability, water resistance, and ease of installation. It mimics the look of hardwood or stone while providing superior stability and low maintenance. This guide covers step-by-step installation procedures and critical considerations to ensure a successful project.
2. Tools and Materials Required
Tools
- Measuring Tools: Tape measure, chalk line, and straightedge.
- Cutting Tools: Utility knife, circular saw with carbide blade, or jigsaw for precise cuts.
- Installation Aids: Rubber mallet, tapping block, spacers (8–12 mm), pull bar, and pry bar.
- Safety Gear: Gloves, safety goggles, and knee pads.
- Optional: Heat gun for bending around curves (if applicable).
Materials
- SPC Planks: Ensure they are acclimatized to the room for 48 hours prior to installation.
- Underlayment: Moisture barrier (e.g., 6-mil polyethylene) and/or acoustic pad (if needed).
- Adhesive: For glue-down installations (check manufacturer specifications).
- Transition Strips: For doorways or where flooring meets different surfaces.
- Caulk/Sealant: To seal expansion gaps or edges.
3. Subfloor Preparation
Key Requirements
- Cleanliness: Remove debris, dust, and old flooring. Sweep and vacuum thoroughly.
- Flatness: The subfloor must be level within 3 mm per 2 meters. Use a self-leveling compound for uneven surfaces.
- Dryness: Ensure moisture content is below 4.5% (concrete) or 12% (wood). Use a moisture meter to test.
- Stability: Secure loose boards, fill cracks, and repair damaged areas.
Subfloor Types
- Concrete: Cure for at least 60 days. Apply a moisture barrier if installing below grade.
- Wood: Ensure plywood or OSB is structurally sound and free of squeaks. Avoid installing over untreated concrete.
- Tile: Check for loose tiles; use a leveling compound to smooth grout lines.

4. Installation Methods
Method 1: Floating (Click-Lock) Installation
- Layout Planning: Start from the longest wall or the most visible corner. Use spacers to leave 8–12 mm expansion gaps around the perimeter.
- First Row: Place the first plank with the tongue facing the wall. Secure it using spacers.
- Subsequent Rows: Insert the tongue of the next plank into the groove of the previous one at a 45° angle. Press down until it clicks. Use a rubber mallet and tapping block to ensure tight joints.
- Cutting Planks: Measure and cut planks to fit the remaining space, ensuring the last piece is at least 20 cm long. Stagger joints by at least 30 cm for stability.
- Finishing: Remove spacers and install transition strips or baseboards to cover expansion gaps.
Method 2: Glue-Down Installation
- Adhesive Application: Apply a thin, even layer of SPC-specific adhesive to the subfloor. Follow the manufacturer’s drying time instructions.
- Plank Placement: Press planks firmly into the adhesive, using a roller to eliminate air bubbles.
- Edge Sealing: Seal edges with caulk to prevent moisture ingress.
Method 3: Loose-Lay Installation
- Direct Placement: Lay planks without adhesive, relying on friction to hold them in place. Ideal for temporary setups or over existing floors.
5. Key Considerations and Best Practices
Expansion Gaps
- Perimeter Gaps: Always leave 8–12 mm gaps around walls, door frames, and fixed structures to accommodate thermal expansion.
- Large Areas: For rooms exceeding 100 m², install expansion joints every 10–15 meters.
Moisture Control
- Underlayment: Use a moisture barrier (e.g., polyethylene film) on concrete or damp subfloors.
- Avoid Water Exposure: While SPC is waterproof, prolonged submersion can damage the core.
Temperature and Humidity
- Ideal Conditions: Install at 18–27°C with humidity between 30–60%. Avoid extreme fluctuations during and after installation.
Cutting and Fitting
- Precision Cuts: Score planks with a utility knife and snap them along the scored line for clean edges.
- Doorways: Undercut doorjambs to ensure the flooring fits seamlessly.
Safety
- Ventilation: Ensure adequate airflow during glue-down installations to minimize VOC exposure.
- Tool Use: Follow manufacturer guidelines for power tools to prevent accidents.
6. Post-Installation Care
- Cleaning: Use a damp mop or microfiber cloth with a pH-neutral cleaner. Avoid abrasive chemicals.
- Stain Removal: Wipe spills immediately. Use a mixture of water and vinegar for stubborn stains.
- Maintenance: Periodically inspect for loose planks and re-secure as needed. Avoid dragging heavy furniture.
- Warranty: Review the manufacturer’s warranty for coverage details and maintenance requirements.
7. Common Issues and Solutions
| Problem | Cause | Solution |
|---|---|---|
| Gaps Between Planks | Inadequate locking or debris | Re-lock joints or clean debris. |
| Warping/Cupping | Moisture or improper expansion gaps | Address moisture issues and check gaps. |
| Squeaking | Uneven subfloor or loose planks | Re-level subfloor or secure loose planks. |
| Scratches | Abrasive cleaners or heavy traffic | Use protectors on furniture legs. |
8. Environmental and Safety Standards
- Formaldehyde Emissions: SPC flooring typically meets E1 or E0 standards (≤0.5 mg/L), ensuring low toxicity.
- Fire Resistance: Most SPC products achieve B1 fire rating (non-combustible).
- VOC Compliance: Look for low-VOC options for indoor air quality.
9. Conclusion
Installing SPC flooring is a rewarding DIY project that offers long-lasting results with proper preparation and execution. By following these guidelines, you can achieve a professional finish while enjoying the benefits of durability, water resistance, and aesthetic appeal. Always consult the manufacturer’s instructions for specific product requirements and seek professional help for complex installations.

Production Process of SPC Floor
A "Superhero" in the Home Furnishing Industry
Related Article

SPC flooring, rigid vinyl SPC flooring, click-lock SPC flooring, waterproof SPC flooring, formaldehyde-free SPC flooring, residential SPC flooring, commercial SPC flooring, stone plastic composite flooring, scratch resistant SPC flooring
Waterproof Click-Lock SPC Flooring – Formaldehyde-Free Rigid Vinyl SPC Flooring for Residential Renovation and Commercial Engineering Projects
SPC flooring, rigid vinyl SPC flooring, click-lock SPC flooring, waterproof SPC flooring, zero-formaldehyde SPC flooring, scratch resistant SPC flooring, residential SPC flooring, commercial SPC flooring
2026 Trendy SPC Flooring – Zero-Formaldehyde Waterproof Click-Lock Rigid Vinyl SPC Flooring for Residential Renovation and Commercial Engineering Projects
SPC Flooring, Rigid Vinyl SPC Flooring, Click-Lock SPC Flooring, Waterproof SPC Flooring, Formaldehyde-Free SPC Flooring, Scratch Resistant SPC Flooring, Residential SPC Flooring, Commercial SPC Flooring
Durable Click-Lock SPC Flooring – Formaldehyde-Free Waterproof Rigid Vinyl Flooring for Modern Residential and Commercial Renovation
SPC flooring, rigid SPC vinyl flooring, click-lock SPC flooring, waterproof SPC flooring, scratch resistant SPC flooring, formaldehyde-free SPC floor, residential SPC flooring, commercial SPC flooring
Stable Click-Lock SPC Flooring – Waterproof, Scratch Resistant & Formaldehyde-Free Rigid Vinyl SPC Flooring for Residential and Commercial Decoration