
Maintenance and Replacement of LVT Flooring: A Comprehensive Guide
2025-08-29
Luxury Vinyl Tile (LVT) flooring has emerged as a popular choice in both residential and commercial spaces due to its durability, versatility, and cost-effectiveness. Mimicking the appearance of natural materials like hardwood, stone, or ceramic while offering superior resilience, LVT floors can withstand heavy foot traffic, moisture, and daily wear—provided they receive proper care. However, even the most robust flooring systems require regular maintenance to preserve their aesthetic appeal and extend their lifespan. When wear and tear become excessive, timely replacement becomes essential to avoid safety hazards and maintain the functionality of the space. This article explores the best practices for LVT flooring maintenance, identifies key signs that indicate replacement is necessary, and outlines a step-by-step process for safe and effective replacement.
1. Understanding LVT Flooring: Key Characteristics for Maintenance
Before delving into maintenance and replacement, it is critical to understand the unique properties of luxury vinyl tile floor, as these directly influence care requirements. LVT consists of multiple layers: a backing layer (often made of foam or fiberglass for stability), a vinyl core (resistant to water and impact), a design layer (print that replicates natural materials), and a wear layer (a transparent, protective coating that shields against scratches, stains, and fading). The thickness of the wear layer—measured in mils (1 mil = 0.001 inches)—is a primary determinant of durability: residential LVT typically has a wear layer of 6–12 mils, while commercial spaces (such as offices, retail stores, or schools) require thicker layers (12–20 mils) to handle high foot traffic.
This layered structure means LVT is waterproof (unlike hardwood) and resistant to scratches, but it is not impervious to damage. For example, the wear layer can degrade over time with heavy use, and the vinyl core may warp if exposed to standing water for extended periods. Additionally, harsh chemicals or abrasive cleaning tools can strip the wear layer, ruining the floor’s appearance. Understanding these vulnerabilities is the first step in developing an effective maintenance routine.
2. Routine Maintenance: Preserving LVT Flooring Daily
Routine maintenance is the foundation of extending LVT flooring’s lifespan. It involves simple, daily tasks that prevent dirt, debris, and moisture from accumulating and causing long-term damage. By incorporating these practices into regular cleaning schedules, homeowners and facility managers can keep LVT floors looking new for years.
Routine maintenance is the foundation of extending LVT flooring’s lifespan. It involves simple, daily tasks that prevent dirt, debris, and moisture from accumulating and causing long-term damage. By incorporating these practices into regular cleaning schedules, homeowners and facility managers can keep LVT floors looking new for years.
2.1 Daily Sweeping and Dusting
Dirt, sand, and small debris are the biggest enemies of LVT flooring. When walked on, these particles act like abrasives, scratching the wear layer and dulling the floor’s finish over time. To prevent this, sweep or dust-mop LVT floors daily (or multiple times a day in high-traffic areas like entryways or hallways). Use a soft-bristle broom or a microfiber dust mop—avoid stiff brushes, as they can scratch the surface. For hard-to-reach areas (e.g., under furniture or along baseboards), use a vacuum cleaner with a soft brush attachment (never use a beater bar, which can damage the wear layer).
Dirt, sand, and small debris are the biggest enemies of LVT flooring. When walked on, these particles act like abrasives, scratching the wear layer and dulling the floor’s finish over time. To prevent this, sweep or dust-mop LVT floors daily (or multiple times a day in high-traffic areas like entryways or hallways). Use a soft-bristle broom or a microfiber dust mop—avoid stiff brushes, as they can scratch the surface. For hard-to-reach areas (e.g., under furniture or along baseboards), use a vacuum cleaner with a soft brush attachment (never use a beater bar, which can damage the wear layer).
2.2 Prompt Spill Cleanup
LVT is waterproof, but standing water or liquid spills can seep into gaps between tiles (if not properly sealed) or damage the subfloor over time. Additionally, acidic or staining liquids (e.g., coffee, wine, juice, or oil) can leave permanent marks if left untreated. To address spills:
LVT is waterproof, but standing water or liquid spills can seep into gaps between tiles (if not properly sealed) or damage the subfloor over time. Additionally, acidic or staining liquids (e.g., coffee, wine, juice, or oil) can leave permanent marks if left untreated. To address spills:
(1)Blot the spill immediately with a clean, absorbent cloth or paper towel to remove excess liquid. Do not wipe or scrub, as this can spread the spill and push it into gaps.
(2)For sticky or staining spills (e.g., soda, sauce), use a damp cloth with warm water to gently wipe the area. Avoid harsh chemicals like bleach, ammonia, or acetone, which can dissolve the wear layer and discolor the design.
(3)For tough stains (e.g., ink or nail polish), use a mild, pH-neutral cleaner specifically formulated for LVT flooring. Test the cleaner on a small, inconspicuous area first to ensure it does not cause discoloration.
2.3 Protecting Against Furniture and Heavy Objects
Furniture legs, chair casters, and heavy appliances (e.g., refrigerators, washing machines) can leave indentations or scratches on LVT flooring. To prevent this:
Furniture legs, chair casters, and heavy appliances (e.g., refrigerators, washing machines) can leave indentations or scratches on LVT flooring. To prevent this:
(1)Place furniture pads (made of felt or rubber) under the legs of chairs, tables, sofas, and cabinets. Replace worn pads regularly to maintain protection.
(2)For rolling chairs (common in offices), use soft, non-marking casters designed for vinyl flooring. Avoid hard plastic or metal casters, which can scratch the surface.
(3)When moving heavy furniture or appliances, lift them instead of dragging. If lifting is not possible, place a thick towel or piece of plywood under the item to distribute weight and prevent scratches.
3. Periodic Maintenance: Deep Cleaning and Long-Term Protection
While daily maintenance prevents minor damage, periodic deep cleaning and protective measures are necessary to address accumulated dirt and restore the floor’s shine. The frequency of periodic maintenance depends on foot traffic: residential spaces may need it every 1–3 months, while commercial spaces may require it monthly.
While daily maintenance prevents minor damage, periodic deep cleaning and protective measures are necessary to address accumulated dirt and restore the floor’s shine. The frequency of periodic maintenance depends on foot traffic: residential spaces may need it every 1–3 months, while commercial spaces may require it monthly.
3.1 Deep Cleaning with a Mop
Over time, dirt and grime can build up on the wear layer, making the floor look dull. For deep cleaning:
(1)Fill a bucket with warm water and a pH-neutral LVT cleaner (avoid soap-based cleaners, which leave a sticky residue). Follow the cleaner’s instructions for dilution—using too much cleaner can damage the wear layer.
(2)Use a damp (not soaking wet) mop to clean the floor in small sections. Wring the mop thoroughly to prevent excess water from pooling, which can seep into gaps or damage the subfloor.
(3)After mopping, dry the floor immediately with a clean towel or microfiber cloth to prevent water spots and ensure no moisture remains.
(4)For high-traffic areas with heavy dirt buildup (e.g., entryways), you may need to scrub gently with a soft-bristle brush. Avoid using scouring pads or steel wool, as they are abrasive and will scratch the wear layer.
3.2 Reapplying Protective Coatings (If Needed)
Some LVT flooring products have a “urethane” or “polyurethane” wear layer that can be refreshed with a protective coating over time. This is more common in commercial LVT, where the wear layer is exposed to constant foot traffic. Before reapplying a coating:
Some LVT flooring products have a “urethane” or “polyurethane” wear layer that can be refreshed with a protective coating over time. This is more common in commercial LVT, where the wear layer is exposed to constant foot traffic. Before reapplying a coating:
(1)Ensure the floor is completely clean and dry. Any dirt or moisture will be trapped under the coating, causing bubbling or discoloration.
(2)Choose a coating specifically designed for LVT flooring (consult the manufacturer’s recommendations to avoid voiding warranties).
(3)Apply the coating in thin, even layers using a paint roller or microfiber applicator. Allow each layer to dry fully (usually 4–6 hours) before applying a second layer.
(4)Avoid walking on the floor for 24 hours after the final coat to ensure the coating sets properly.
3.3 Inspecting for Gaps and Damage
Periodic maintenance should also include a thorough inspection of the flooring for gaps, cracks, or loose tiles. Gaps between tiles can allow moisture to seep into the subfloor, leading to warping or mold growth. To address gaps:
Periodic maintenance should also include a thorough inspection of the flooring for gaps, cracks, or loose tiles. Gaps between tiles can allow moisture to seep into the subfloor, leading to warping or mold growth. To address gaps:
(1)If gaps are small (less than 1/8 inch), use a LVT seam sealer (available at home improvement stores) to fill them. Apply the sealer with a small brush, wipe away excess, and allow it to dry.
(2)If tiles are loose or cracked, replace them immediately (see Section 5 for a step-by-step guide to tile replacement). Delaying replacement can cause adjacent tiles to become damaged, increasing repair costs.
4. Signs That LVT Flooring Needs Replacement
Despite proper maintenance, LVT flooring will eventually reach the end of its lifespan. Knowing when to replace LVT is critical to avoid safety hazards (e.g., tripping over loose tiles) and maintain the space’s aesthetic appeal. Below are the key signs that replacement is necessary:
4.1 Excessive Wear on the Wear Layer
The wear layer is the first line of defense against scratches and fading. When it becomes worn down, the design layer underneath becomes exposed, leading to discoloration, dullness, and vulnerability to further damage. Signs of excessive wear include:
The wear layer is the first line of defense against scratches and fading. When it becomes worn down, the design layer underneath becomes exposed, leading to discoloration, dullness, and vulnerability to further damage. Signs of excessive wear include:
(1)Visible scratches or scuffs that cannot be removed with cleaning.
(2)Fading or discoloration in high-traffic areas (e.g., pathways from doors to furniture).
(3)The floor feels rough or uneven to the touch (indicating the wear layer has been worn through in spots).
If the wear layer is less than 6 mils thick (common in older residential LVT) and shows these signs, replacement is often more cost-effective than repairs—refreshing the wear layer with coatings may not be effective, as there is not enough material left to protect.
4.2 Warping or Buckling
Warping (when the floor curves upward at the edges) or buckling (when the floor lifts in the middle) is usually caused by moisture damage to the subfloor or improper installation (e.g., insufficient expansion gaps). Warped LVT cannot be repaired, as the vinyl core has been permanently damaged. Additionally, warped floors create tripping hazards and can damage adjacent tiles. If more than 10% of the flooring is warped or buckled, full replacement is recommended.
4.3 Mold or Mildew Growth
While LVT is waterproof, mold or mildew can grow under the flooring if moisture seeps into the subfloor (e.g., from a leaky pipe or flooding). Signs of mold include a musty odor, discoloration on the underside of tiles, or visible mold growth along baseboards. If mold is widespread (covering more than a small section), replacement is necessary—cleaning the mold may not eliminate the problem, as spores can remain in the subfloor and spread.
While LVT is waterproof, mold or mildew can grow under the flooring if moisture seeps into the subfloor (e.g., from a leaky pipe or flooding). Signs of mold include a musty odor, discoloration on the underside of tiles, or visible mold growth along baseboards. If mold is widespread (covering more than a small section), replacement is necessary—cleaning the mold may not eliminate the problem, as spores can remain in the subfloor and spread.
4.4 Loose or Damaged Tiles (Beyond Repair)
If multiple tiles are loose, cracked, or broken, and repairs (e.g., replacing individual tiles) do not restore the floor’s stability, full replacement is needed. Loose tiles can shift when walked on, causing gaps and further damage. Additionally, if the subfloor is damaged (e.g., rotted wood or cracked concrete) beneath the LVT, replacing the flooring is an opportunity to repair the subfloor and prevent future issues.
If multiple tiles are loose, cracked, or broken, and repairs (e.g., replacing individual tiles) do not restore the floor’s stability, full replacement is needed. Loose tiles can shift when walked on, causing gaps and further damage. Additionally, if the subfloor is damaged (e.g., rotted wood or cracked concrete) beneath the LVT, replacing the flooring is an opportunity to repair the subfloor and prevent future issues.
4.5 Outdated Appearance or Remodeling
Even if LVT flooring is structurally sound, homeowners or business owners may choose to replace it for aesthetic reasons—e.g., updating to a new design, matching a room’s remodel, or selling a property. LVT technology and design options evolve rapidly, so replacing old flooring can refresh the space and increase its value.
Even if LVT flooring is structurally sound, homeowners or business owners may choose to replace it for aesthetic reasons—e.g., updating to a new design, matching a room’s remodel, or selling a property. LVT technology and design options evolve rapidly, so replacing old flooring can refresh the space and increase its value.
5. Step-by-Step Guide to LVT Flooring Replacement
Replacing LVT flooring is a manageable DIY project for homeowners with basic handyman skills, but commercial spaces or large areas may require professional installation. Below is a detailed guide to replacing LVT flooring, from preparation to final cleanup.
5.1 Preparation: Gather Tools and Materials
Before starting, gather the following tools and materials to ensure a smooth process:
(1)Tools: Utility knife, pry bar, hammer, tape measure, level, notched trowel (for adhesive), rubber mallet, spacers (for expansion gaps), and a vacuum cleaner.
(2)Materials: New LVT tiles/planks, LVT adhesive (if using glue-down LVT; floating LVT does not require adhesive), subfloor primer (if needed), seam sealer, and transition strips (to connect the new floor to adjacent surfaces like carpet or tile).
(3)Safety gear: Work gloves, safety glasses, and a dust mask (to protect against dust from removing old flooring).
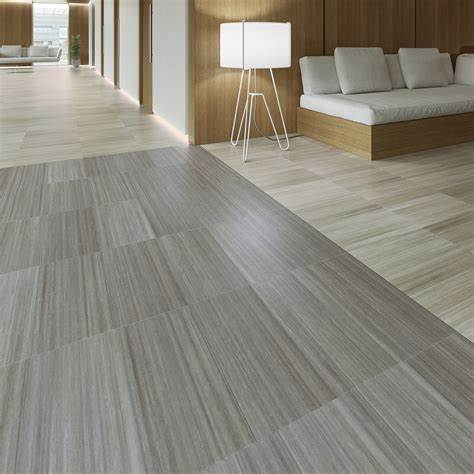
5.2 Remove Old Flooring and Prepare the Subfloor
The first step in replacement is removing the old LVT flooring and preparing the subfloor. A clean, level subfloor is essential for proper LVT installation—uneven or damaged subfloors can cause the new flooring to warp or crack.
The first step in replacement is removing the old LVT flooring and preparing the subfloor. A clean, level subfloor is essential for proper LVT installation—uneven or damaged subfloors can cause the new flooring to warp or crack.
(1)Clear the space: Remove all furniture, appliances, and decor from the room. Cover doorways with plastic sheeting to prevent dust from spreading to other areas.
(2)Remove baseboards and transition strips: Use a pry bar and hammer to gently remove baseboards (save them if you plan to reuse them) and transition strips (e.g., between the old LVT and carpet).
(3)Remove old LVT flooring:
1)For floating LVT (tiles/planks that click together without adhesive), start at a corner and lift the first tile using a pry bar. Once the first tile is removed, the rest can be pulled apart easily.
2)For glue-down LVT (tiles adhered to the subfloor), use a utility knife to cut the flooring into small sections (2–3 feet square) to make removal easier. Then, use a pry bar to lift each section—you may need to scrape off remaining adhesive with a floor scraper.
(4)Clean and inspect the subfloor: Vacuum the subfloor to remove dust and debris. Inspect for damage:
1)For wood subfloors: Check for rot, warping, or loose boards. Replace damaged boards and secure loose ones with screws.
2)For concrete subfloors: Check for cracks, holes, or moisture. Fill cracks with concrete patching compound and ensure the subfloor is dry (use a moisture meter—concrete should have a moisture level of less than 4%). If moisture is high, apply a moisture barrier or primer.
(5)Level the subfloor: Use a level to check for uneven areas. For minor unevenness (less than 1/4 inch), use a floor leveling compound. For larger gaps, consult a professional to avoid structural issues.
5.3 Install New LVT Flooring
Once the subfloor is prepared, it’s time to install the new LVT flooring. The installation process varies slightly depending on whether you are using floating LVT or glue-down LVT.
Level the subfloor: Use a level to check for uneven areas. For minor unevenness (less than 1/4 inch), use a floor leveling compound. For larger gaps, consult a professional to avoid structural issues.
5.3.1 Installing Floating LVT
Floating LVT is the most popular choice for DIY projects due to its easy click-together installation.
Floating LVT is the most popular choice for DIY projects due to its easy click-together installation.
(1)Acclimate the new LVT: Before installation, lay the new tiles/planks flat in the room for 24–48 hours. This allows the flooring to adjust to the room’s temperature and humidity, preventing warping after installation.
(2)Plan the layout: Measure the room and mark the center line (using a tape measure and chalk line) to ensure the flooring is installed evenly. Start laying tiles from the center line toward the walls—this ensures that the tiles at the edges are not too narrow (aim for tiles at least 2 inches wide at the edges; if not, adjust the starting point).
(3)Install the first row: Place spacers along the wall (to create a 1/4-inch expansion gap—LVT expands and contracts with temperature changes, so this gap prevents buckling). Lay the first tile along the center line, then click the next tile into place (follow the manufacturer’s instructions for clicking). Continue until the first row is complete.
(4)Install subsequent rows: For the second row, stagger the tiles (like brickwork) to create a more stable floor and improve aesthetics. Click each tile into the previous row and use a rubber mallet to tap tiles into place (be gentle to avoid damaging the edges).
(5)Cut tiles for edges and obstacles: When reaching walls, doorways, or obstacles (e.g., pipes), measure the space and mark the tile with a pencil. Use a utility knife to cut the tile—score the surface multiple times, then snap it along the score line. For curved cuts (e.g., around pipes), use a jigsaw with a fine-tooth blade.
5.3.2 Installing Glue-Down LVT
Glue-down LVT is more permanent and suitable for high-traffic commercial spaces. It requires more precision, as the adhesive sets quickly.
Glue-down LVT is more permanent and suitable for high-traffic commercial spaces. It requires more precision, as the adhesive sets quickly.
(1)Acclimate the new LVT (same as floating LVT: 24–48 hours in the room).
(2)Apply adhesive to the subfloor: Use a notched trowel (size depends on the LVT thickness—check the manufacturer’s recommendations) to spread adhesive evenly over a small section of the subfloor (20–30 square feet at a time). Do not apply adhesive to the entire floor at once, as it will dry before you can lay the tiles.
(3)Lay the tiles: Place the first tile on the adhesive, aligning it with the center line. Press down firmly to ensure good adhesion—use a roller (100–150 pounds) to roll over the tile and remove air bubbles. Repeat with subsequent tiles, leaving a 1/8-inch gap between tiles for seam sealer.
(4)Stagger rows and cut tiles (same as floating LVT).
(5)Allow adhesive to dry: Let the adhesive dry for 24–48 hours (follow the manufacturer’s instructions) before walking on the floor or replacing furniture.
5.4 Finish the Installation
After installing the new LVT parquet flooring, complete the following steps to ensure a professional finish:
After installing the new LVT parquet flooring, complete the following steps to ensure a professional finish:
(1)Apply seam sealer: Once the adhesive is dry (for glue-down LVT) or the tiles are installed (for floating LVT), apply seam sealer to the gaps between tiles. This prevents moisture from seeping into the subfloor and keeps tiles secure.
(2)Install transition strips: Attach transition strips to connect the new LVT floor to adjacent surfaces (e.g., carpet, tile, or thresholds). Use screws or adhesive to secure the strips.
(3)Replace baseboards: Reattach the old baseboards (or install new ones) using nails or screws. Caulk the gap between the baseboard and the floor to create a clean, finished look.
(4)Clean the floor: Vacuum the new floor to remove dust, then wipe it with a damp cloth and mild cleaner. Avoid using harsh chemicals for the first 30 days to allow the adhesive and sealer to set fully.
6. Conclusion
LVT flooring is a durable, versatile option for any space, but its longevity depends on proper maintenance and timely replacement. By following daily and periodic maintenance practices—such as sweeping, prompt spill cleanup, and protecting.
LVT flooring is a durable, versatile option for any space, but its longevity depends on proper maintenance and timely replacement. By following daily and periodic maintenance practices—such as sweeping, prompt spill cleanup, and protecting.
How to Choose High-Quality LVT Flooring: A Complete Guide for Homeowners
Is LVT Flooring Suitable for Bathrooms?
Related Article

LVT flooring, luxury vinyl tile flooring, flexible LVT flooring, premium LVT flooring, waterproof LVT flooring, anti-slip LVT flooring, residential LVT flooring, commercial LVT flooring, decorative vinyl flooring
Premium Flexible LVT Flooring – Stylish Waterproof Anti-Slip Luxury Vinyl Tile Flooring for High-End Residential and Commercial Interior Design
LVT flooring, Luxury Vinyl Tile flooring, flexible LVT flooring, waterproof LVT flooring, anti‑slip LVT flooring, wear‑resistant LVT flooring, residential LVT flooring, commercial LVT flooring, glue‑down LVT flooring
Premium Flexible LVT Flooring – Stylish Waterproof Anti‑Slip Luxury Vinyl Tile Flooring for High‑End Residential and Commercial Interior Design
LVT flooring, Luxury Vinyl Tile flooring, flexible LVT flooring, waterproof LVT flooring, anti-slip LVT flooring, residential LVT flooring, commercial LVT flooring, decorative vinyl flooring
Premium LVT Flooring – Flexible Waterproof Anti-Slip Luxury Vinyl Tile Flooring for Residential Interior and Commercial Space Decoration
LVT flooring, Luxury Vinyl Tile flooring, flexible LVT flooring, waterproof LVT flooring, anti-slip LVT flooring, residential LVT flooring, commercial LVT flooring, stylish vinyl tile flooring
Premium LVT Flooring – Flexible Waterproof Anti-Slip Luxury Vinyl Tile Flooring for Residential Interior and Commercial Space Decoration